I need wedding reception table names or numbers, everyone knows that. But, finding the right ones in the right colors (my wedding colors are navy blue and pale pink) proved more difficult than expected. I thought about tables named after golf courses, or doing places my fiance and I had been, but I just couldn't get it figured out. So, I settled on doing table numbers, boring right? Not really because I plan to call them "pins" or "holes" on the seating chart to make reference to our subtle golf theme, and I found some gorgeous options. I finally settled on the following numbers I found on etsy.com in Frank's Crafts Store. The price was $60.00, plus shipping: http://www.etsy.com/listing/90459663/table-numbers-10-34-tall-with-base-set-1
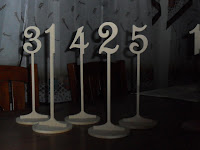 |
| The table numbers! |
I think the shop's owner is willing to paint the numbers, but I thought I'd give it a try (since it looks like painted numbers run about $120.00). So, here's how I painted the table numbers navy to match my wedding color theme.
1.) First, the numbers and stands are separate pieces, come wrapped up and are made of a sort of particle board. So, I got them all out and began to prepare them separately.
2.) I started by sanding the numbers down.
3.) I then cleaned the numbers with soap and water. From there, I used a sealer ($4.00) I bought at Michael's to seal the numbers first which will allow the paint to go smoother and closes up the pores of the wood. Here's a picture of the sealer and the sponge brush ($0.49) I used (I tried a regular painting brush but it didn't work as well to get a smooth finish).
4.) After the sealer dried, I sanded the numbers again lightly and washed them off again. Then I started with the paint I got on sale at Michael's for about $3.00. Here's what I used:
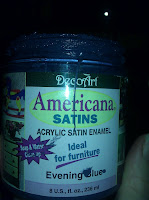 |
| American Satin in Evening Blue |
5.) I painted the numbers standing in their stands making sure to get in the little crevices of the numbers. I'm sure you could use spray paint too, but I think this worked well because of the way the numbers are shaped.
6.) After the numbers dried, I decided I wanted to make sure that the paint had a deeper colored look to them and so I wanted to add a second coat. I sanded the numbers down one last time, you can see how they look after I sanded them below:
7.) Then I painted them one more time and let them dry.
8.) I finished the numbers off with a coat of shellac spray (be sure to spray outside and on cardboard backer).
9.) I did the same technique for the stands and I now have my final product! Hope you like:


I love seeing all of your ideas! So creative!
ReplyDelete